 Free shipping on orders $50+


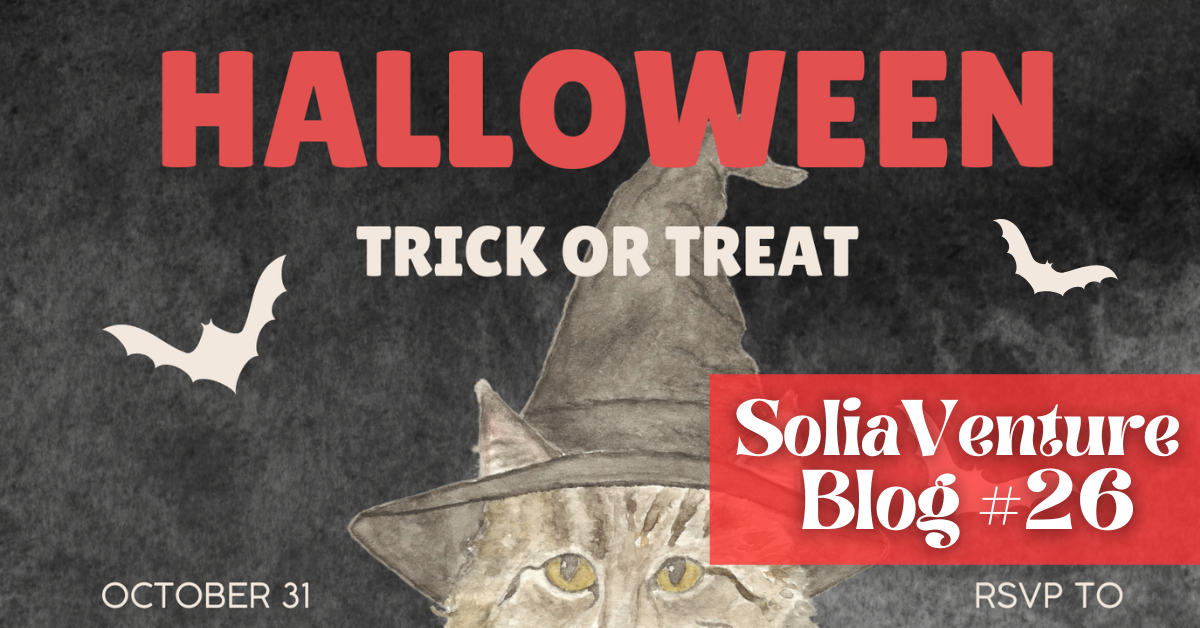
How I Painted My Halloween Cat
People often ask me how I make my greeting cards (and if I really make them myself!).
And the answer is yes — every single one! Recently, I’ve been creating most of my cards using watercolor.
About a year ago, I started an art class at Art School of San Francisco Bay. It’s one of the best decisions I’ve made. I’ve been learning watercolor and oil painting, and I can really see how much my technique has improved since I began.
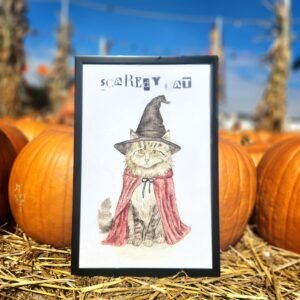
Today, I want to share the story of how I painted my Halloween Cat — and some fun watercolor tips! I pictured a cat that looked elegant and mysterious, not cartoonish, with a Halloween vibe.
Stick with me until the end — I’ve got a little Halloween surprise waiting for you! 🎃
The First Step
I started with a pencil sketch on printer paper. It was my “rough draft” where I could make as many dark lines and adjustments as I needed.
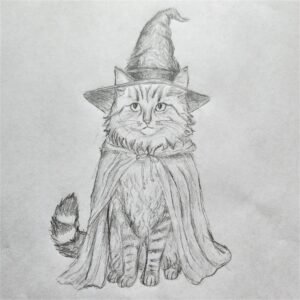

Once I was happy with the sketch, I placed it on a light box and traced it onto thick watercolor paper. That step helped me keep the final paper clean — no messy erasing or heavy pencil marks.
Face: Light Washes
This was my favorite part — painting!
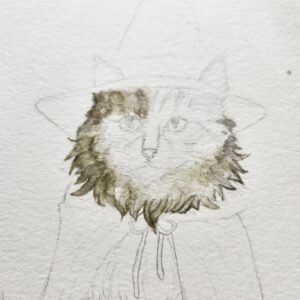
I laid a very light, watery beige over the main fur areas. Then I nudged in gentle shadows around the eyes and nose. I almost never use straight black; I prefer mixing my darkest tones from deep browns and blues so the “black” belongs to the rest of the palette. A common beginner mistake is using paint straight from the watercolor set without adjusting it; I always mix my own shade and add a few drops of water so the layers stay smooth and not chalky.
Building the Features (small brush time)
When it was time for the face details, I switched to a smaller brush and took my time.
The eyes, nose, and mouth can completely change how a painting feels.
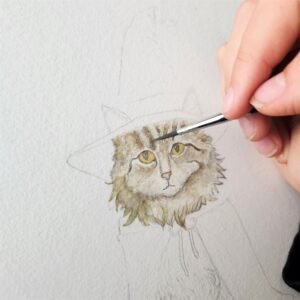
Also, with watercolor, you can’t simply paint over mistakes like with oils — it’s transparent, and too many layers can even damage the paper. So every stroke counts.
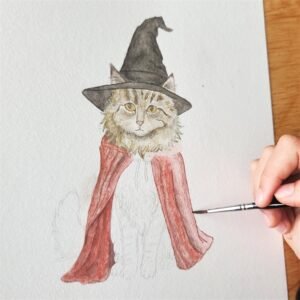
Cape and Hat
When the face finally looked right, I moved to the outfit. I laid a soft red wash over the cape, then toned it down by mixing in a touch of green (red’s complementary color) to get a richer, calmer red for the folds.
Then, once those first layers were dry, I deepened the shadows — behind the cape’s creases, under the hat brim, and in the fur’s darker stripes.
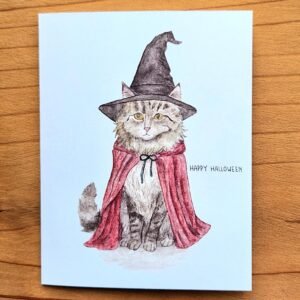
The Whiskers
Whiskers are tricky in watercolor because they’re white. I couldn’t just paint black lines, and cutting out tiny white streaks didn’t look right. So… I left them out! 🤭
Did you notice?
The Final Result!
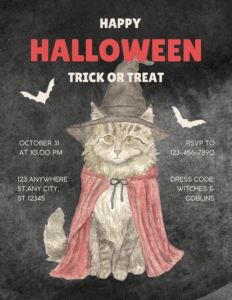
The Freebie
As promised, here’s your Halloween Cat freebie!
You can download the design as a printable PDF — perfect to use as a Halloween poster or invitation. Print it at home or have it printed at a local shop for a beautiful result.
A Little Note
Watching YouTube tutorials can teach you a lot, but an in-person class is another level. It pushes you to practice, learn faster, and stay committed.
I love jumping on a Muni every Saturday morning, heading to class, and spending a few hours surrounded by people who love art as much as I do.
Taking this art class was a real decision for me. It meant reorganizing my weekly schedule — and it came with a cost. But honestly, it’s been such a great investment.
If you’re curious, here’s where I go: Art School of San Francisco Bay.
🤝 Before You Go
💌 New here? You can still catch up — read our previous newsletters here.
Zélia, for SoliaVenture